Sabtu, 06 September 2014
Responsive Egg Sharing Buttons For Blogger
You might have seen many types of sharing buttons while surfing through internet such as floating buttons, responsive buttons, round buttons but I am sure that you haven't seen this type of gadget. Its an egg having sharing buttons.
Continue reading »
Jumat, 05 September 2014
How To Create A Post In Blogger
Every beginner doesn't know how to create his first post but its very easy to create post in blogger. You don't need any Html knowledge for creating a post all you need is the ability of writing good posts. In Blogger some tools are provided which helps you to create your post easily in the way you like. You can find these tools on the top of the editing page or writing post page. These tools include a compose or html tabs, compose tab is the tab in which you write your post while html tab is that tab which helps you to add any html code in your post for example adding ads, a slideshow, embed box and so on.
Continue reading »
Kamis, 04 September 2014
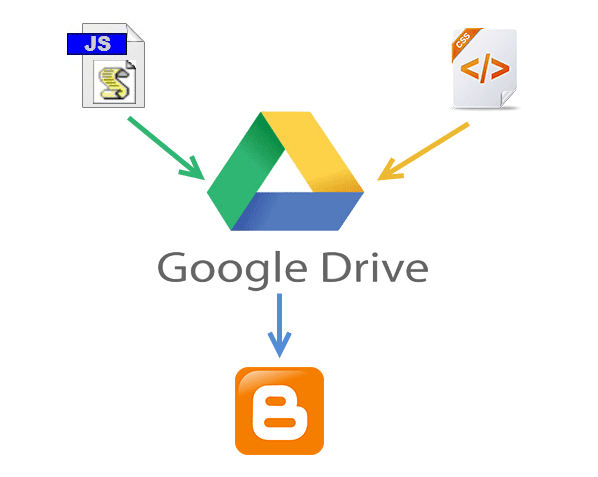
How To Host Blogger CSS and JavaScript Files in Google Drive
Anyone that has ever worked on a web design or development can tell you that where you decide to store your files is important. Every time someone visits your site, the server or host will access this location and bring up the relevant files that need to be displayed. Wherever you decide to store your files, this will have an impact on some important aspects like the speed that your site loads, your overall SEO ranking and your ability to make necessary adjustments to the site.
Slow loading speeds can negatively impact your SEO ratings because the slower the site is, the less likely that visitors are going to wait around for it to load. If someone visits your site and immediately clicks the 'back' button because it's taking too long to load, that is going to increase your bounce rate and provide Google with statistics that show your site is either low quality or irrelevant to the search keywords.
Clear file structure and a central location provide you with incentive to organize everything and name them appropriately. All the content that is relevant to the subject of your website or blog will be in the same location for web crawlers to review.
If you're a Blogger site owner, this is something you need to think about. When you need to make alterations to things like social media sharing buttons, popular posts, recent posts and related posts widgets, you have to know where everything is intended to go, or risk losing both available content and money.
Some of the larger sites that produce hundreds of unique articles each month can't afford to have content in different locations. When articles start to get lost out of order, they run the risk of duplicating content on their site, or forgetting to post it altogether. Things should be right at your fingertips to minimize mistakes and reduce the amount of time spent editing the site while it's still live.
Google Drive provides ample amount of space to store large files, and offers collaboration services so that you can work among different team members on the same project. Some of the files that you upload into the cloud services can remain unpublished and stay within the private site, whereas other files like blog posts can be published or stored to the public site.
Another beneficial feature of storing all your Blogger files on Google Drive is that it is highly secure. Google comes with the backing of one of the leading companies in the technical world so that you can be sure your content is safe from hackers and those looking to compromise your site.
This guide will provide you with step-by-step instructions on how to setup your Blogger site using Google Drive. It's completely free to take advantage of this strategy, and will provide you with a solid platform from which to build your blog.
For example, the link to mycssfile.css that I copied looks like this:
If you want to add a CSS file, type the following tag inside the search box and hit Enter to find it:
If you want to add a Javascript file, search for the following tag:
Finally, press the 'Save template' button to save the changes. And you're done!
Next time you want to edit any of the information or move internal files, all you have to do is open up the Google Drive folder on your account and make the modifications from that location. Those files will then automatically sync to the online folder and make updates to your site. This works the same if you want to change the appearance by modifying the CSS code to extend the header, footer, or make customizations.
As you can see, changing your file storage out so that is CSS and JavaScript is stored on your Google Drive account is easy to do and only takes a few minutes. After you make the change, you can begin benefiting from faster loading speeds, higher SEO rankings, and overall a more convenient platform to work from to increase the efficiency of your work.
Things To Think About
When you are designing your online structure and where to store your important CSS and JavaScript files, here is a run down on how this decision might impact your site later on:Site Loading Speed
By combining some of the style sheets and website files, the Blogger server only has to collect information from a single location. When you split up your files or decentralize the file system, it takes a longer time for all the data to come together to make your site possible.Slow loading speeds can negatively impact your SEO ratings because the slower the site is, the less likely that visitors are going to wait around for it to load. If someone visits your site and immediately clicks the 'back' button because it's taking too long to load, that is going to increase your bounce rate and provide Google with statistics that show your site is either low quality or irrelevant to the search keywords.
File Storage Affects SEO
In addition to increasing your bounce rate, storing your files in a central location and managing the name of your files can affect SEO site wide. Web crawlers enlisted by Google, or some of the other search engines, index both the code on your site, and the name and directory of your files. If file names are random or not placed in the proper categories, the web crawlers aren't going to know what to do with the information.Clear file structure and a central location provide you with incentive to organize everything and name them appropriately. All the content that is relevant to the subject of your website or blog will be in the same location for web crawlers to review.
Storage Locations Affect Editing Abilities
Shuffling through files and folders or opening up FTP connections just to make some simple edits can be a hassle, and take up a lot of time that could have otherwise have been spent writing new content.If you're a Blogger site owner, this is something you need to think about. When you need to make alterations to things like social media sharing buttons, popular posts, recent posts and related posts widgets, you have to know where everything is intended to go, or risk losing both available content and money.
Some of the larger sites that produce hundreds of unique articles each month can't afford to have content in different locations. When articles start to get lost out of order, they run the risk of duplicating content on their site, or forgetting to post it altogether. Things should be right at your fingertips to minimize mistakes and reduce the amount of time spent editing the site while it's still live.
Storing Javascript/CSS Files With Google Drive
Storing Blogger CSS and JavaScript files with Google Drive will help to eliminate any of the problems mentioned above and reduce the clutter among your services. Taking this method can increase your site speed, increase the opportunities for a successful SEO campaign, and make your life so much easier.Google Drive provides ample amount of space to store large files, and offers collaboration services so that you can work among different team members on the same project. Some of the files that you upload into the cloud services can remain unpublished and stay within the private site, whereas other files like blog posts can be published or stored to the public site.
Another beneficial feature of storing all your Blogger files on Google Drive is that it is highly secure. Google comes with the backing of one of the leading companies in the technical world so that you can be sure your content is safe from hackers and those looking to compromise your site.
This guide will provide you with step-by-step instructions on how to setup your Blogger site using Google Drive. It's completely free to take advantage of this strategy, and will provide you with a solid platform from which to build your blog.
Step 1. Prepare the CSS/JavaScript Files
- First, we need to create the file that we need to host. To host a CSS file, open the Notepad and paste the CSS code (if it is enclosed within the <style> and </style> tags, remove them).
- In the Notepad menu, select 'File' > 'Save as' and type the file name with the .css extension just like I did with mycssfile.css - see the screenshot below.
- In the same window, choose "All files" in the "Save as type" option and set the Character Encoding to UTF-8.
- If you want to host a JavaScript file, add the .js extension (instead of .css) at the end of your file name (remove the <script>...</script> tags if you see them). Click "Save" and navigate to the location where you want to save the file.
Step 2. Upload Your File on Google Drive
- Access https://drive.google.com and log in with your Gmail account. After you logged in, click on the 'Create' button and add a new separate folder to upload your JavaScript and CSS files.
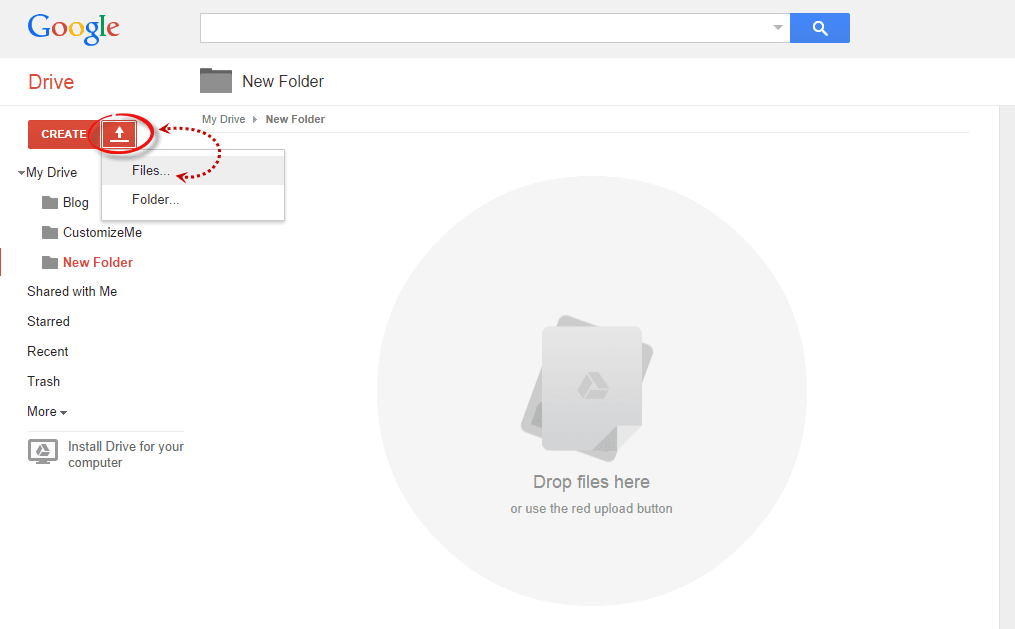
- Open the newly created folder, and click on the Upload button with the upward arrow to choose the files that you need to upload.
- Now, navigate to the location where you saved the files, select them (to select multiple files, press and hold down the Ctrl key on your keyboard and then click on them) and press the Open button.
- After the files have been successfully uploaded, right click on the file names (to select all your files in the folder, click on the checkbox) and select 'Share':
- In the 'Sharing settings' window, click on the 'Change' link and choose the 'Public on the web' option. Press 'Save' and copy the link(s) of your uploaded file(s) from the 'Links to share' box highlighted in blue, then paste it into a Notepad to use it later.
Step 3. How to Add an External CSS/JavaScript file to Blogger
Before you can use the links, you must replace 'https://drive.google.com/file/d' to 'https://googledrive.com/host' and remove '/edit?usp=sharing' in the link.For example, the link to mycssfile.css that I copied looks like this:
https://drive.google.com/file/d/0B4n9GL3eVuV-TkphMkc3SFR2Slk/edit?usp=sharingNotice the part in blue after the "/file/d/" part. That is the file ID which is used to access it via the new hosting service. It should start with the following URL:
https://googledrive.com/host/Add the file ID like this (remove the '/edit?usp=sharing' part):
https://googledrive.com/host/0B4n9GL3eVuV-TkphMkc3SFR2SlkNow log into your Blogger account, select your blog and go to Template > Edit HTML. Click anywhere inside the code area and press the CTRL + F keys to open the search box:
If you want to add a CSS file, type the following tag inside the search box and hit Enter to find it:
<head>Just BELOW the <head> tag, add this line:
<link rel="stylesheet" type="text/css" href="https://googledrive.com/host/0B4n9GL3eVuV-TkphMkc3SFR2Slk" />And replace https://googledrive.com/host/0B4n9GL3eVuV-TkphMkc3SFR2Slk with the link of your CSS file:
If you want to add a Javascript file, search for the following tag:
</body>And add this line just ABOVE it:
<script src='https://googledrive.com/host/0B4n9GL3eVuV-eVYwLXBrTlZrVDg' type='text/javascript'></script>Replace the line in blue with your URL:
Finally, press the 'Save template' button to save the changes. And you're done!
In Conclusion
Once you have successfully saved all your file folders and closed out of the drive. Open your site in a browser and make sure that all the changes have completed successfully.Next time you want to edit any of the information or move internal files, all you have to do is open up the Google Drive folder on your account and make the modifications from that location. Those files will then automatically sync to the online folder and make updates to your site. This works the same if you want to change the appearance by modifying the CSS code to extend the header, footer, or make customizations.
As you can see, changing your file storage out so that is CSS and JavaScript is stored on your Google Drive account is easy to do and only takes a few minutes. After you make the change, you can begin benefiting from faster loading speeds, higher SEO rankings, and overall a more convenient platform to work from to increase the efficiency of your work.
How To Add Welcome Bar Having Share Buttons In Blogger
Blogging isn't just about building traffic and earning money. It is also about how you maintain your blog so visitors to your blog take some beneficial action such as sharing your posts, subscribing to your blog, following on social networks and so on.
Continue reading »
Selasa, 02 September 2014
How To Earn Money Through Your Blog
Blogging is a good way to earn money. If you have a blog having good traffic and it is seo friendly then you can earn money easily with it. Many bloggers are earning thousand of dollars at this time. You can also earn money through your blog. Other method of earning money are using PTC sites(sites paying for clicking ads) but it is not a worth method until you have referrals.
Continue reading »
Senin, 01 September 2014
How To Upload and Use Custom Fonts in Blogger
Just about anyone can write and publish his or her own blog. In fact, there are about 152 million blogs out there on the internet. But, if you want your blog to stand out you need to impress visitors with the little things. You need to be able to catch there attention and keep it so that they want to come back.
Complementing your blog post with images, links, and catchy titled is a great way to start and should be something you practice on just about everything you post; however, don't just stop there. If you really want to impress people and draw attention toward your blog, you want to start where the content all begins. You need to make use of custom fonts in Blogger. This guide will help you learn a little bit about font styles and how to upload new fonts onto your Blogger site.
Within each web browser there are also certain types of font files that are used. Most of the browsers, except Internet Explorer and the iOS browser, will use TTF font file. Internet Explorer is the only web browser service that uses EOS files, and Apple has opted for using an SVG for their mobile and tablet based products. Some custom fonts in Blogger have to be in an @Font-Face kit, but this will be discussed later on.
Using the Google Web Fonts service, you run a filter to find select fonts based on width, thickness, and slant. Better yet, you can test out how using the custom fonts in Blogger would appear by modifying the size, and viewing it in a small display window. If you like a couple different fonts, you can save them to your collection to come back to later.
To organize the fonts by style, you can use the menu on the left side. The top menu lets you to add and preview your own text using the 'Preview Text' field. From the same menu, you can pick the 'Size' and sort the fonts in 'Alphabetical order', by 'Date added', 'Number of styles' and 'Popularity':
Step 2. Once you decided what font you want to use, click on the 'Add to Collection' button and then hit the 'Use' tab. This will take you to the 'Almost done!' page that will give you a link to the style sheet found in the 'Standard' tab (point 3) and the CSS style (point 4).
The link to style sheet would look like this:
Step 3. Now that you have selected the fonts and have a general understanding of the different types of fonts available, you can head over to your Blogger blog. Open up the Dashboard and make sure that the first thing you do is to create a backup of your template: go to Template and press the "Backup/Restore" button on the upper right side. That way, you can revert the changes back to the original in case something goes wrong.
Step 4. From the same "Template" location, press the "Edit HTML" button:
Step 5. Click anywhere inside the code area and press CTRL + F at the same time (PC) or Command + F (Mac) to open the Blogger' search box and type <b:skin> inside the search box. Press Enter and it will take you to the <b:skin> tag, which will be highlighted in yellow:
Step 6. Directly above the <b:skin> tag, copy & paste the link to the style sheet provided by Google Web Fonts (step 2). To prevent any errors, add a forward slash (/) right before the closing angle bracket (>), like this:
For example, if I would want to add the "Rancho" font to the posts and comments titles, I will paste the CSS style like this:
You can also add the same CSS to "Template" > press the "Customize" button the right side, navigate to "Advanced" > "Add CSS" tab and paste the CSS code in the empty box.
Step 8. Finally, press the "Save Template" button and you're all set!
If you are using the Font Squirrel Webfont Generator: press the "Add Fonts" button, choose the font file that you saved on your desktop and check the "Yes, the fonts I'm uploading are legally eligible for web embedding." checkbox. After the font has been successfully uploaded, click the "Download your kit" button.
This should open the kit containing 4 formats of fonts (inside the fonts folder), a CSS stylesheet & the html file for the demo page. The only files that you need to extract are the ones with the .woff, .tff, .svg, .eot extension and the stylesheet.css file.
Once you've uploaded them, copy the Public URL's of all 4 fonts: right click on each file, choose "Copy public link..." and press the "Copy to clipboard" button. Paste each link separately in a Notepad, so that you can link to that location later.
Next, open up the stylesheet.css file that came with the kit and it will show you a similar code:
For example, if you uploaded the font .tff file with this name:
Finally, we need to declare the custom font using CSS. For example, if I want to change the font of the post title, I will add the line in red from above, just below the "h3.post-title, .comments h4 {" CSS selector:
Do you have any other methods for adding custom fonts? Let us know by leaving a comment below!
Complementing your blog post with images, links, and catchy titled is a great way to start and should be something you practice on just about everything you post; however, don't just stop there. If you really want to impress people and draw attention toward your blog, you want to start where the content all begins. You need to make use of custom fonts in Blogger. This guide will help you learn a little bit about font styles and how to upload new fonts onto your Blogger site.
The Different Types of Font
Before you can upload any font files, you need to find the right font and typeface that will fit your style. Typeface is the design and symbols used for the letters; font is the actual characters. Some of the most common typeface terms that you should probably be familiar with before starting are:- Serif - distinguished by small decorative lines that are attached to the end of letter strokes; best used for the paragraph or body content.
- Sans-serif - modern looking letter strokes that lack the decorate lines at the end; instead the letter end abruptly.
- Script - a handwriting typeface that looks like cursive letters or custom strokes.
- Display - typeface that is designed to stand out from the rest of the page; characterized by a broad and unique use of informal letter designs and transparency. Display typeface is best used on titles and headers.
Within each web browser there are also certain types of font files that are used. Most of the browsers, except Internet Explorer and the iOS browser, will use TTF font file. Internet Explorer is the only web browser service that uses EOS files, and Apple has opted for using an SVG for their mobile and tablet based products. Some custom fonts in Blogger have to be in an @Font-Face kit, but this will be discussed later on.
Where to Find Font
You can find custom font all over the internet when you're ready to get started. Some custom fonts in Blogger are free to use and can be downloaded to your computer, others you are considered 'premium' and you have to pay to use them, so please check twice whether they are having Commercial or Personal licenses. Google offers its own font service known as Google Web Fonts which can be a good place to start looking around for custom fonts in Blogger.Using the Google Web Fonts service, you run a filter to find select fonts based on width, thickness, and slant. Better yet, you can test out how using the custom fonts in Blogger would appear by modifying the size, and viewing it in a small display window. If you like a couple different fonts, you can save them to your collection to come back to later.
Adding a Custom Font to Blogger from Google Web Font
Step 1. To browse the Google Fonts library, access www.google.com/webfonts. There are 650 font families in the collection right now, and they keep adding more, so you may want to sort them.To organize the fonts by style, you can use the menu on the left side. The top menu lets you to add and preview your own text using the 'Preview Text' field. From the same menu, you can pick the 'Size' and sort the fonts in 'Alphabetical order', by 'Date added', 'Number of styles' and 'Popularity':
Step 2. Once you decided what font you want to use, click on the 'Add to Collection' button and then hit the 'Use' tab. This will take you to the 'Almost done!' page that will give you a link to the style sheet found in the 'Standard' tab (point 3) and the CSS style (point 4).
The link to style sheet would look like this:
<link href='http://fonts.googleapis.com/css?family=FONTNAME' rel='stylesheet' type='text/css'>And the CSS style would look like this:
font-family: 'FONTNAME', cursive;
Step 3. Now that you have selected the fonts and have a general understanding of the different types of fonts available, you can head over to your Blogger blog. Open up the Dashboard and make sure that the first thing you do is to create a backup of your template: go to Template and press the "Backup/Restore" button on the upper right side. That way, you can revert the changes back to the original in case something goes wrong.
Step 4. From the same "Template" location, press the "Edit HTML" button:
Step 5. Click anywhere inside the code area and press CTRL + F at the same time (PC) or Command + F (Mac) to open the Blogger' search box and type <b:skin> inside the search box. Press Enter and it will take you to the <b:skin> tag, which will be highlighted in yellow:
Step 6. Directly above the <b:skin> tag, copy & paste the link to the style sheet provided by Google Web Fonts (step 2). To prevent any errors, add a forward slash (/) right before the closing angle bracket (>), like this:
<link href='http://fonts.googleapis.com/css?family=FONTNAME' rel='stylesheet' type='text/css' />Step 7. To apply the font on a specific part of our blog, we'll need to find the CSS selector and add the CSS style (point 4) just AFTER the curly bracket. If you don't know how to find the id/class selector, please read this tutorial: Add CSS rules to Design a Blogger blog using Firebug
For example, if I would want to add the "Rancho" font to the posts and comments titles, I will paste the CSS style like this:
h3.post-title, .comments h4 {Where "h3.post-title, .comments h4 {" is the class selector for the post and comments titles. Note: to change the size of your font, add the "font-size: 28px;" part as well, and change the "28px" value to make the font bigger/smaller.
font-family: 'Rancho', cursive;
font-size: 28px;
}
You can also add the same CSS to "Template" > press the "Customize" button the right side, navigate to "Advanced" > "Add CSS" tab and paste the CSS code in the empty box.
Step 8. Finally, press the "Save Template" button and you're all set!
Using a Custom Font that isn't on Google Web Fonts
Some of the good places to find free fonts are DaFont, FontSquirrel and UrbanFonts. Click to download the kit (unzip it if necessary), and save the TFF or OFT file on your desktop.Step 1: Convert the Font File
The font file that you've downloaded is most likely in a TFF or OFT file since this is the most popular type. You need to convert this file into a @Font-Face kit. Many online services can help you do this, but here are two recommended sites:If you are using the Font Squirrel Webfont Generator: press the "Add Fonts" button, choose the font file that you saved on your desktop and check the "Yes, the fonts I'm uploading are legally eligible for web embedding." checkbox. After the font has been successfully uploaded, click the "Download your kit" button.
This should open the kit containing 4 formats of fonts (inside the fonts folder), a CSS stylesheet & the html file for the demo page. The only files that you need to extract are the ones with the .woff, .tff, .svg, .eot extension and the stylesheet.css file.
Step 2: Upload The Font Files To Blogger
Custom fonts in Blogger have to be uploaded before you can use them. For this, we are going to use Dropbox and upload them to Public folder (upload only the files with the .woff, .tff, .svg and .eot extension).Once you've uploaded them, copy the Public URL's of all 4 fonts: right click on each file, choose "Copy public link..." and press the "Copy to clipboard" button. Paste each link separately in a Notepad, so that you can link to that location later.
Next, open up the stylesheet.css file that came with the kit and it will show you a similar code:
/* Generated by Font Squirrel (http://www.fontsquirrel.com) on September 2, 2014 */Edit the link location to point toward the font file that you just uploaded to the Dropbox Public folder and pay attention to each extension which should correspond with that found in the stylesheet.css file.
@font-face {
font-family: 'fontname';
src: url('font-name.eot');
src: url('font-name.eot?#iefix') format('embedded-opentype'),
url('font-name.woff') format('woff'),
url('font-name.ttf') format('truetype'),
url('font-name.svg#fontname') format('svg');
font-weight: normal;
font-style: normal;
}
For example, if you uploaded the font .tff file with this name:
https://dl.dropboxusercontent.com/u/62316253/amatic-bold-webfont.ttf...change the CSS link in blue in this line:
url('font-name.ttf') format('truetype'),to point to:
url('https://dl.dropboxusercontent.com/u/62316253/amatic-bold-webfont.ttf') format('truetype'),After you've added all the links, copy the stylesheet.css code that you modified to your clipboard.
Step 3: Editing Blogger's CSS
Open up the CSS on your Blogger site. This can be found by navigating to Template > Edit HTML. Next, click inside the code area and press the CTRL + F keys to open the search box, then type the tag below and hit Enter to find it:]]></b:skin>Just ABOVE this tag, add the code that you copied in the stylesheet.css file.
Finally, we need to declare the custom font using CSS. For example, if I want to change the font of the post title, I will add the line in red from above, just below the "h3.post-title, .comments h4 {" CSS selector:
h3.post-title, .comments h4 {Obviously, the fontname will be the actual name of the font. This will make sure that your blog can use the custom fonts in Blogger. After we've made these changes, press the "Save Template" button and exit.
font-family: 'fontname';
font-size: 28;
}
Step 4: Test Out the Site
Navigate back to your sites homepage and you should now see the custom fonts in Blogger that you uploaded during the last few steps. Every time you go to make a new post, the site will now be able to use your font.In Conclusion:
Website design is an important part to maintain a successful blog. As a blog owner, you are responsible for providing content that isn't just fun to read, but looks good. Modifying the font is just one easy way that you can help your blog stand out without making any major changes to your blog itself.Do you have any other methods for adding custom fonts? Let us know by leaving a comment below!
3 Different Style Social Sharing Buttons For Blogger
As I said social sharing is a good way to get more visitors to your blog. It is also a good way to make your blog popular. Blogger has its own sharing buttons at the bottom of each post in post footer but they are very small in size and it has only 3-4 icons such as blog this!, Facebook, Twitter and Google+.
Continue reading »
Continue reading »
Langganan:
Postingan (Atom)